Widgets
Widgets are the heart of what makes Hologram special. Display the weather, date and time, reminders, moon phase, system information, inspirational quotes, jokes, you name it, directly on your desktop wallpaper!
Every widget has tons of customizable settings to make it your own, and they can automatically change color depending on your wallpaper.
You can see all of the widgets that Hologram comes with here.
Adding Widgets
Click the "Edit Widgets" button when editing a theme. This will open the widget editor in full screen. When you're done, click the "Save" button to save your changes and exit.
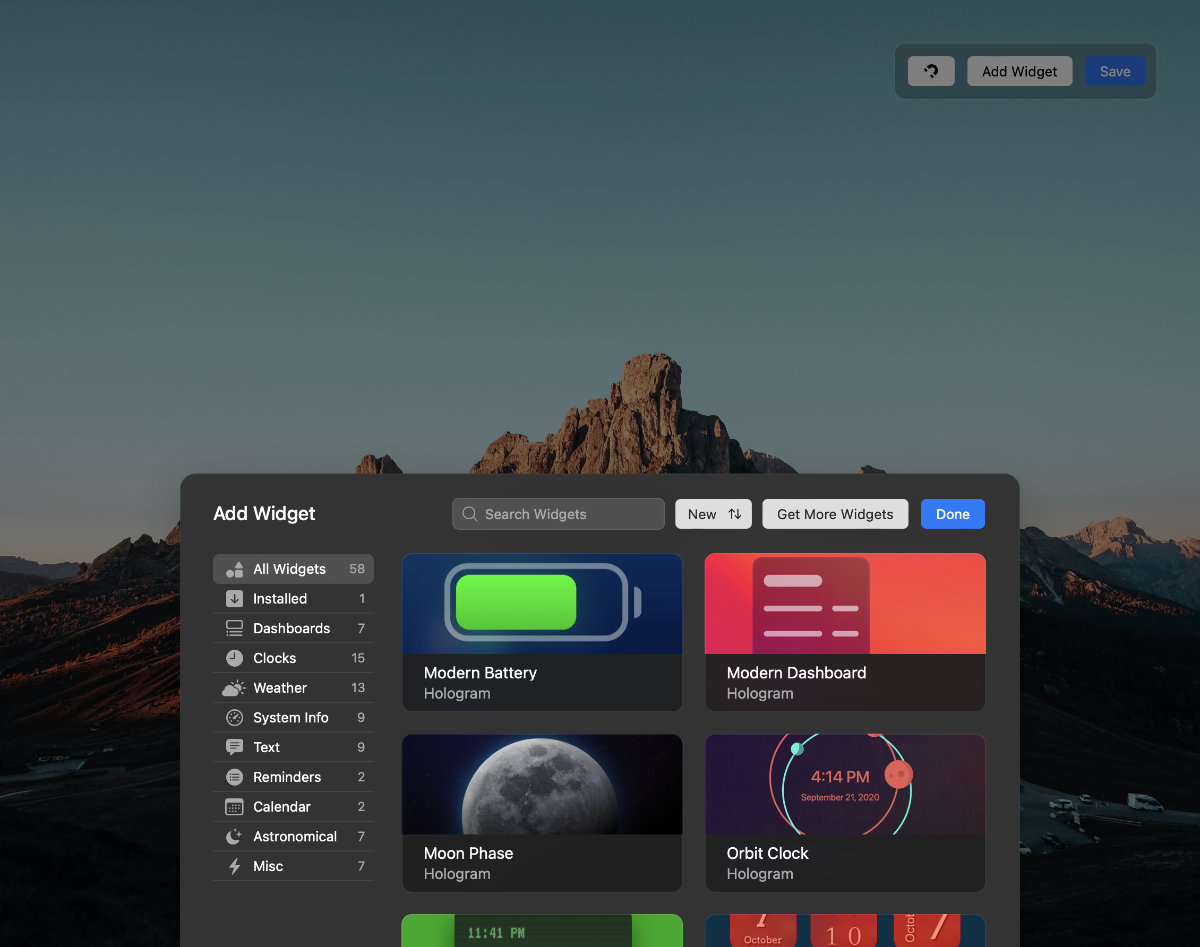
To add a widget to your desktop, click the "Add Widget" button to browse the available widgets. You can browse by category, or search for something specific. Click on any widget to add it to your desktop.
Placing Widgets
When you click on a widget, it will appear on your desktop. You can drag it to any position, and resize it by dragging it from each corner.
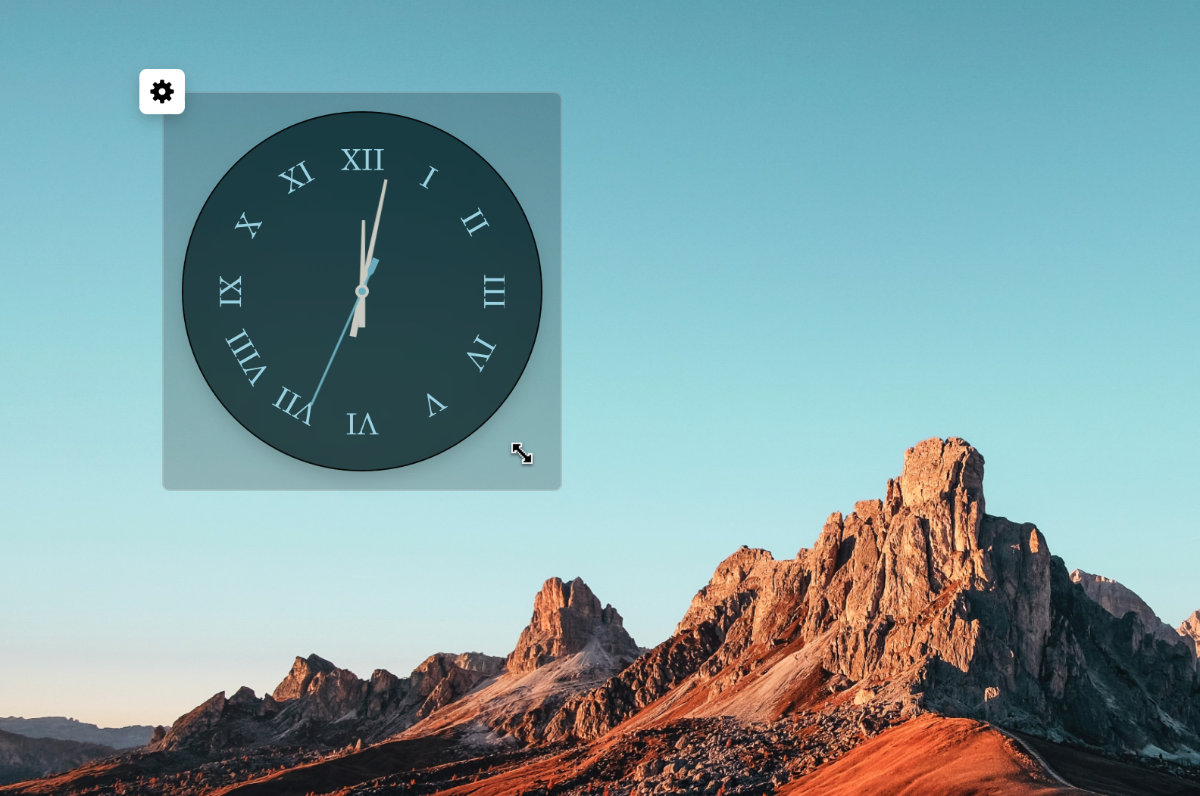
If you press the magnet icon at the top right of the screen, widgets will snap to a grid. This makes it easy to make widgets the same size and align them perfectly.
Editing a Widget's Settings
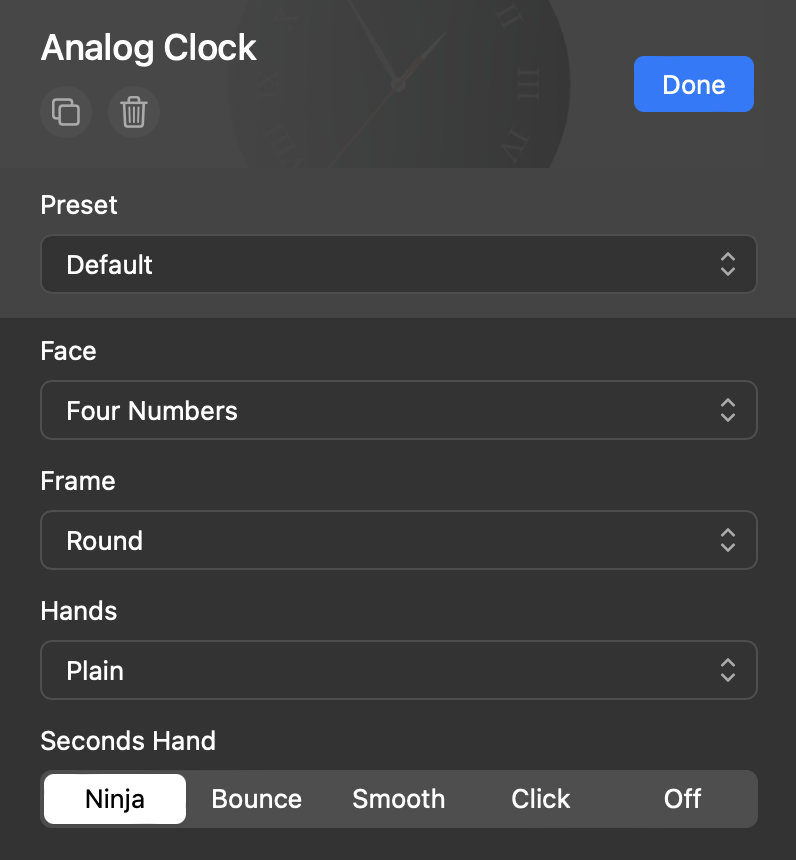
Now that you've picked out your widget and placed it on your desktop, it's time to customize it! Hover over the widget and click on the settings cog to open the widget settings.
At the top of the settings, you can remove the widget, or duplicate it using the buttons on the left.
Some widgets have presets that you can choose from. These are just different combinations of settings that you can use to get started. Below that, you'll find all of the widget's settings.
In our example, we're using the "Analog Clock" widget. It has a bunch of settings to customize the look of the clock such as how the face looks, and you can even choose to show the date and other info as well. Every widget has a unique set of settings, although they do share some similarities such as the ability to change the colors.
Widget Colors
Every widget's colors can be changed in the colors section. You can choose your own custom colors, or use the dropdown to choose automatic colors which will follow your wallpaper.
There are six different auto colors: Dark Vibrant, Dark Muted, Muted, Vibrant, Light Vibrant, Light Muted. Each one of these colors is automatically generated from your wallpaper.
Here, the background color of the analog clock is set to "Light Vibrant", which will set the background to a light and vibrant color based on the wallpaper:
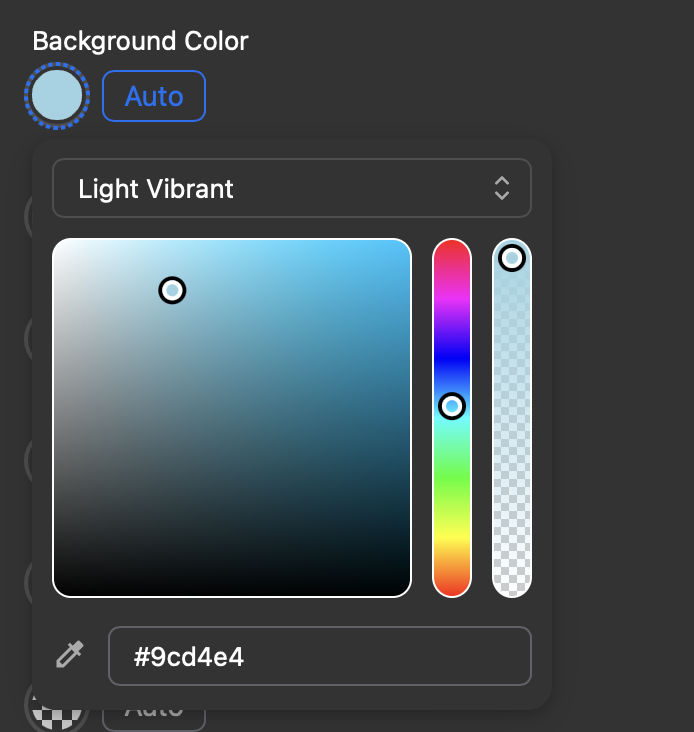
When a color is outlined in blue dots, that means it's automatically generated from your wallpaper. You can also use the eyedropper tool to pick a color directly from anywhere on your wallpaper.
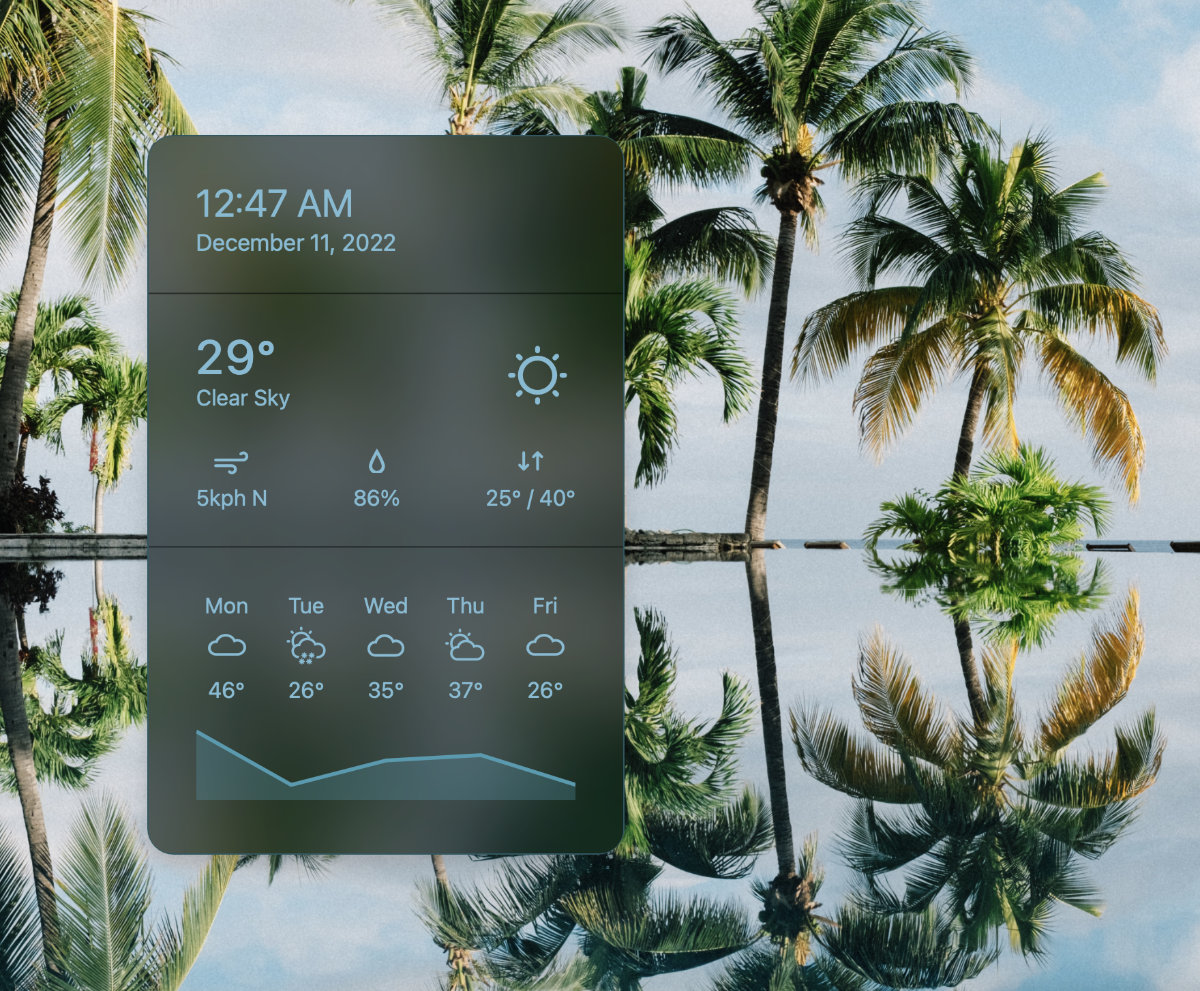
Background Effects
Some widgets have background effects. These are special effects that can be applied to the background of the widget that adds blur and transparency to it. This mimics the vibrancy effect that macOS has.
- Amount - The higher the value, the more the effect will be applied instead of the background color.
- Blur - This adds a blur effect to the background of the widget. The higher the value, the more blur.
- Brightness - This controls the brightness of the background.
- Saturation - This controls how vibrant the background looks. Setting it to 0 will make the background black and white.
Blend Mode, Opacity, and Rotation
You can also change the rotation of a widget, and the opacity (transparency) of it. Changing the blend mode of the widget will change how it blends with the wallpaper.
For example, in the image below, the "Moon Phase" widget is set to the "Overlay" blend mode. This blends the moon into the wallpaper making it look like it's floating in the sky.

Wrapping Up
That's it! You now know how to add widgets to your desktop, and how to customize them. Holograms widgets are ultra customizable, but if you'd like to go a step further, you can create your own completely unique widgets using Holograms developer API.
